いつものようにネタがないので、OpenIndiana oi_151a をインストール → ssh接続 → ちょっとだけRHELライクに変えてみるところまで書いてみようかと。 
なお、今回は "OpenIndiana Build 151a x86 Server CD" を例として使います。
LiveCDのほうみたくGUIなんて出てきませんし、そもそもかなり適当にやってるので、そこのところご了承ください。
- OpenIndianaのダウンロード→http://openindiana.org/
1. インストール
とりあえずサクっと適当にインストールから。
Disks。今回は20GBの仮想ディスクしか作ってないので20GBになってます。 
Fdisk Partitions。めんどくさいからそのまま。 
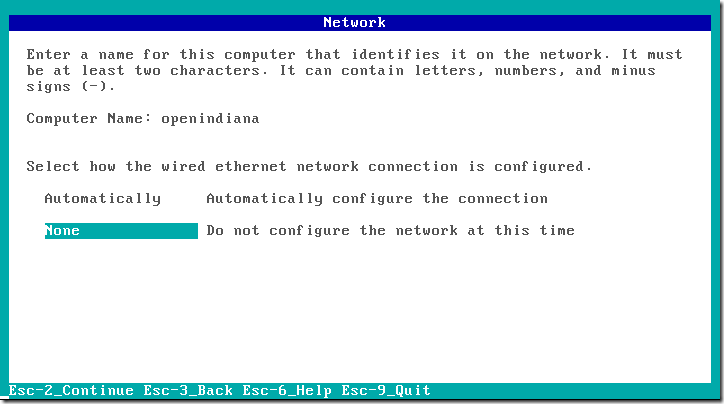
Network。今回はホスト名は "openindiana" で、ethernetは "None" を選択します。
"Automatically" を選択するとDHCPでIPアドレスを取得しますが、今回はサーバ用のお話なので固定IPアドレスで。 
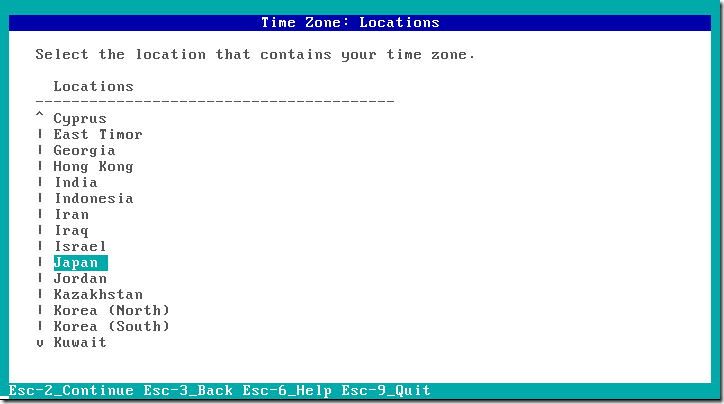
Time ZoneのLocations。"Japan" を選択。
Time Zone。Japanを選択、というかJapanしかない。 
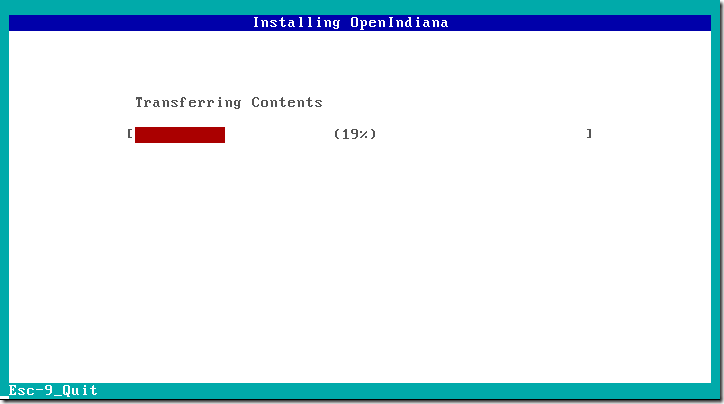
Installation Summary。合ってたらインストール開始。 
2. 設定
画像多くて地味に疲れた……
というわけで、ここからは文字情報で。
まずgrubのタイムアウト設定。
デフォルトはタイムアウトまで30秒なので、5秒ぐらいに設定。
# vi /rpool/boot/grub/menu.lst
timeout 5
2.1 ネットワーク設定("None"の場合)
ネットワークの設定は Network で "None" を選んだときと、"Automatically" を選んだけどもstaticにしたいときの2パターンで書きます。
まずは "None" を選んだときの手順。
ごにょごにょと設定。
今回は "192.168.0.0" ネットワークの "192.168.0.15" というIPアドレスを振るという設定。
よくありそうなご家庭のような感じで。
# vi /etc/nodename
openindiana

# vi /etc/defaultrouter
192.168.0.1

# vi /etc/inet/netmasks
192.168.0.0 255.255.255.0

# vi /etc/resolv.conf
nameserver 192.168.0.1
次にインターフェース名を確認。
# dladm show-phys
LINK         MEDIA                STATE      SPEED  DUPLEX    DEVICE
e1000g0      Ethernet             down       1000   full      e1000g0
今回の場合、デバイスは "e1000g0" なので、この名前でインターフェースを作成して、IPアドレスを振ると。
# ipadm create-if e1000g0

# ipadm create-addr -T static -a 192.168.0.15/24 e1000g0/v4if
※"v4if" のところは識別名なので引っかからない程度に適当で。
インターフェースを有効にすると。
# svcadm enable svc:/network/physical:default

# ifconfig -a
ついでなのでリブート~
# reboot
リブートが済んだら、多分sshで接続出来るようになってる…はず。
2.2 インストール設定("Automatically"の場合)
続いてインストール時に "Automatically" を選んだけども、staticにしたいときの設定。
まず "ifconfig -a" か "ipadm show-if" で、事前にデバイス名を確認。
この場合、さっきと一緒の "e1000g0" なんですが
次にnwamを停止。
# svcadm disable svc:/network/physical:nwam
ごにょごにょ設定。
# vi /etc/nodename
openindiana

# vi /etc/defaultrouter
192.168.0.1

# vi /etc/inet/netmasks
192.168.0.0 255.255.255.0

# vi /etc/resolv.conf
nameserver 192.168.0.1

# cp -p /etc/nsswitch.dns /etc/nsswitch.conf
インターフェースの作成とIPアドレスの割り当て。
# ipadm create-if e1000g0

# ipadm create-addr -T static -a 192.168.0.15/24 e1000g0/v4if
インターフェースを有効。
# svcadm enable svc:/network/physical:default
サクっとリブート~(実はしなくてもいい)
# reboot
リブートしたら、ssh接続出来るようになってると思われ。
3. NTPの設定と起動
次にNTPの設定と起動。
# vi /etc/inet/ntp.conf
server ntp1.jst.mfeed.ad.jp
server ntp2.jst.mfeed.ad.jp
server ntp3.jst.mfeed.ad.jp

# svcadm enable ntp

#ntpq -p
     remote           refid      st t when poll reach   delay   offset  jitter
==============================================================================
 ntp1.jst.mfeed. 210.173.160.86   2 u    4   64    1   25.509  -14.537   0.000
 ntp2.jst.mfeed. 210.173.176.4    2 u    3   64    1   48.603  -23.435   0.000
 ntp3.jst.mfeed. 133.243.236.19   2 u    2   64    1   49.114  -26.104   0.000
4. ちょっとだけRHELライクにしてみる
まぁ邪道かもしれませんが、一応やってみる。主に色的なとこですが。。
まず vim の設定
# vi ~/.vimrc

if v:lang =~ "utf8$" || v:lang =~ "UTF-8$"
   set fileencodings=utf-8,latin1
endif

set nocompatible
set bs=indent,eol,start
set viminfo='20,\"50
set history=50
set ruler
syntax on
set hlsearch

if &term=="xterm"
     set t_Co=8
     set t_Sb=m
     set t_Sf=m
     set term=xterm-color
endif
次に "ls" 発行時の色分けの設定
# vi /etc/DIR_COLORS

# Configuration file for the color ls utility
# This file goes in the /etc directory, and must be world readable.
# You can copy this file to .dir_colors in your $HOME directory to override
# the system defaults.

# COLOR needs one of these arguments: 'tty' colorizes output to ttys, but not
# pipes. 'all' adds color characters to all output. 'none' shuts colorization
# off.
COLOR tty

# Extra command line options for ls go here.
# Basically these ones are:
#  -F = show '/' for dirs, '*' for executables, etc.
#  -T 0 = don't trust tab spacing when formatting ls output.
OPTIONS -F -T 0

# Below, there should be one TERM entry for each termtype that is colorizable
TERM linux
TERM console
TERM con132x25
TERM con132x30
TERM con132x43
TERM con132x60
TERM con80x25
TERM con80x28
TERM con80x30
TERM con80x43
TERM con80x50
TERM con80x60
TERM cons25
TERM xterm
TERM rxvt
TERM xterm-color
TERM color-xterm
TERM vt100
TERM dtterm
TERM color_xterm
TERM ansi
TERM screen
TERM screen.linux
TERM kon
TERM kterm
TERM gnome
TERM konsole

# EIGHTBIT, followed by '1' for on, '0' for off. (8-bit output)
EIGHTBIT 1

# Below are the color init strings for the basic file types. A color init
# string consists of one or more of the following numeric codes:
# Attribute codes:
# 00=none 01=bold 04=underscore 05=blink 07=reverse 08=concealed
# Text color codes:
# 30=black 31=red 32=green 33=yellow 34=blue 35=magenta 36=cyan 37=white
# Background color codes:
# 40=black 41=red 42=green 43=yellow 44=blue 45=magenta 46=cyan 47=white
NORMAL 00       # global default, although everything should be something.
FILE 00         # normal file
DIR 01;34       # directory
LINK 01;36      # symbolic link
FIFO 40;33      # pipe
SOCK 01;35      # socket
BLK 40;33;01    # block device driver
CHR 40;33;01    # character device driver
ORPHAN 01;05;37;41  # orphaned syminks
MISSING 01;05;37;41 # ... and the files they point to

# This is for files with execute permission:
EXEC 01;32

# List any file extensions like '.gz' or '.tar' that you would like ls
# to colorize below. Put the extension, a space, and the color init string.
# (and any comments you want to add after a '#')
.cmd 01;32 # executables (bright green)
.exe 01;32
.com 01;32
.btm 01;32
.bat 01;32
.sh  01;32
.csh 01;32
.tar 01;31 # archives or compressed (bright red)
.tgz 01;31
.arj 01;31
.taz 01;31
.lzh 01;31
.zip 01;31
.z   01;31
.Z   01;31
.gz  01;31
.bz2 01;31
.bz  01;31
.tz  01;31
.rpm 01;31
.cpio 01;31
.jpg 01;35 # image formats
.gif 01;35
.bmp 01;35
.xbm 01;35
.xpm 01;35
.png 01;35
.tif 01;35
# vi ~/.profile
※追記すること。内容はCentOS 5.6の "/etc/profile.d/colorls.sh" からそっくりそのままコピー。

# color-ls initialization

COLORS=/etc/DIR_COLORS
[ -e "/etc/DIR_COLORS.$TERM" ] && COLORS="/etc/DIR_COLORS.$TERM"
[ -e "$HOME/.dircolors" ] && COLORS="$HOME/.dircolors"
[ -e "$HOME/.dircolors.$TERM" ] && COLORS="$HOME/.dircolors.$TERM"
[ -e "$HOME/.dir_colors" ] && COLORS="$HOME/.dir_colors"
[ -e "$HOME/.dir_colors.$TERM" ] && COLORS="$HOME/.dir_colors.$TERM"
[ -e "$COLORS" ] || return

eval `dircolors --sh "$COLORS"`
[ -z "$LS_COLORS" ] && return

if ! egrep -qi "^COLOR.*none" $COLORS >/dev/null 2>/dev/null ; then
     alias ll='ls -l --color=tty' 2>/dev/null
     alias l.='ls -d .* --color=tty' 2>/dev/null
     alias ls='ls --color=tty' 2>/dev/null
else
     alias ll='ls -l' 2>/dev/null
     alias l.='ls -d .*' 2>/dev/null
fi
プロンプトをそれっぽくしてみる
# vi ~/.profile
※デフォルトのやつを少し変えてるだけですが、場合によってはコメントアウトして下のやつをコピペするほうが楽かも。

PS1='[${LOGNAME}@$(/usr/bin/hostname) $(
    [[ "${LOGNAME}" == "root" ]] && printf "%s" "${PWD/${HOME}/~}]# " ||
    printf "%s" "${PWD/${HOME}/~}]\$ ")'
とまぁ、長くなりましたがこんな感じで。


